WordPress Posts Management Tutorial
Overview
This comprehensive tutorial will guide you through creating, editing, and managing posts on the DKA Consult WordPress website, including how to assign categories to your posts.
Table of Contents
- Accessing the Posts Section
- Creating a New Post
- Adding Content to Your Post
- Assigning Categories
- Publishing Your Post
- Editing Existing Posts
- Post Management Tips
Accessing the Posts Section
Step 1: Login to WordPress Dashboard
- Navigate to https://dkaconsult.com/login
- Enter your username and password
- Click "Log In"
Step 2: Navigate to Posts
- Once in the dashboard at https://dkaconsult.com/wp-admin
- Look at the left sidebar menu
- Click on "Posts" → "All Posts"
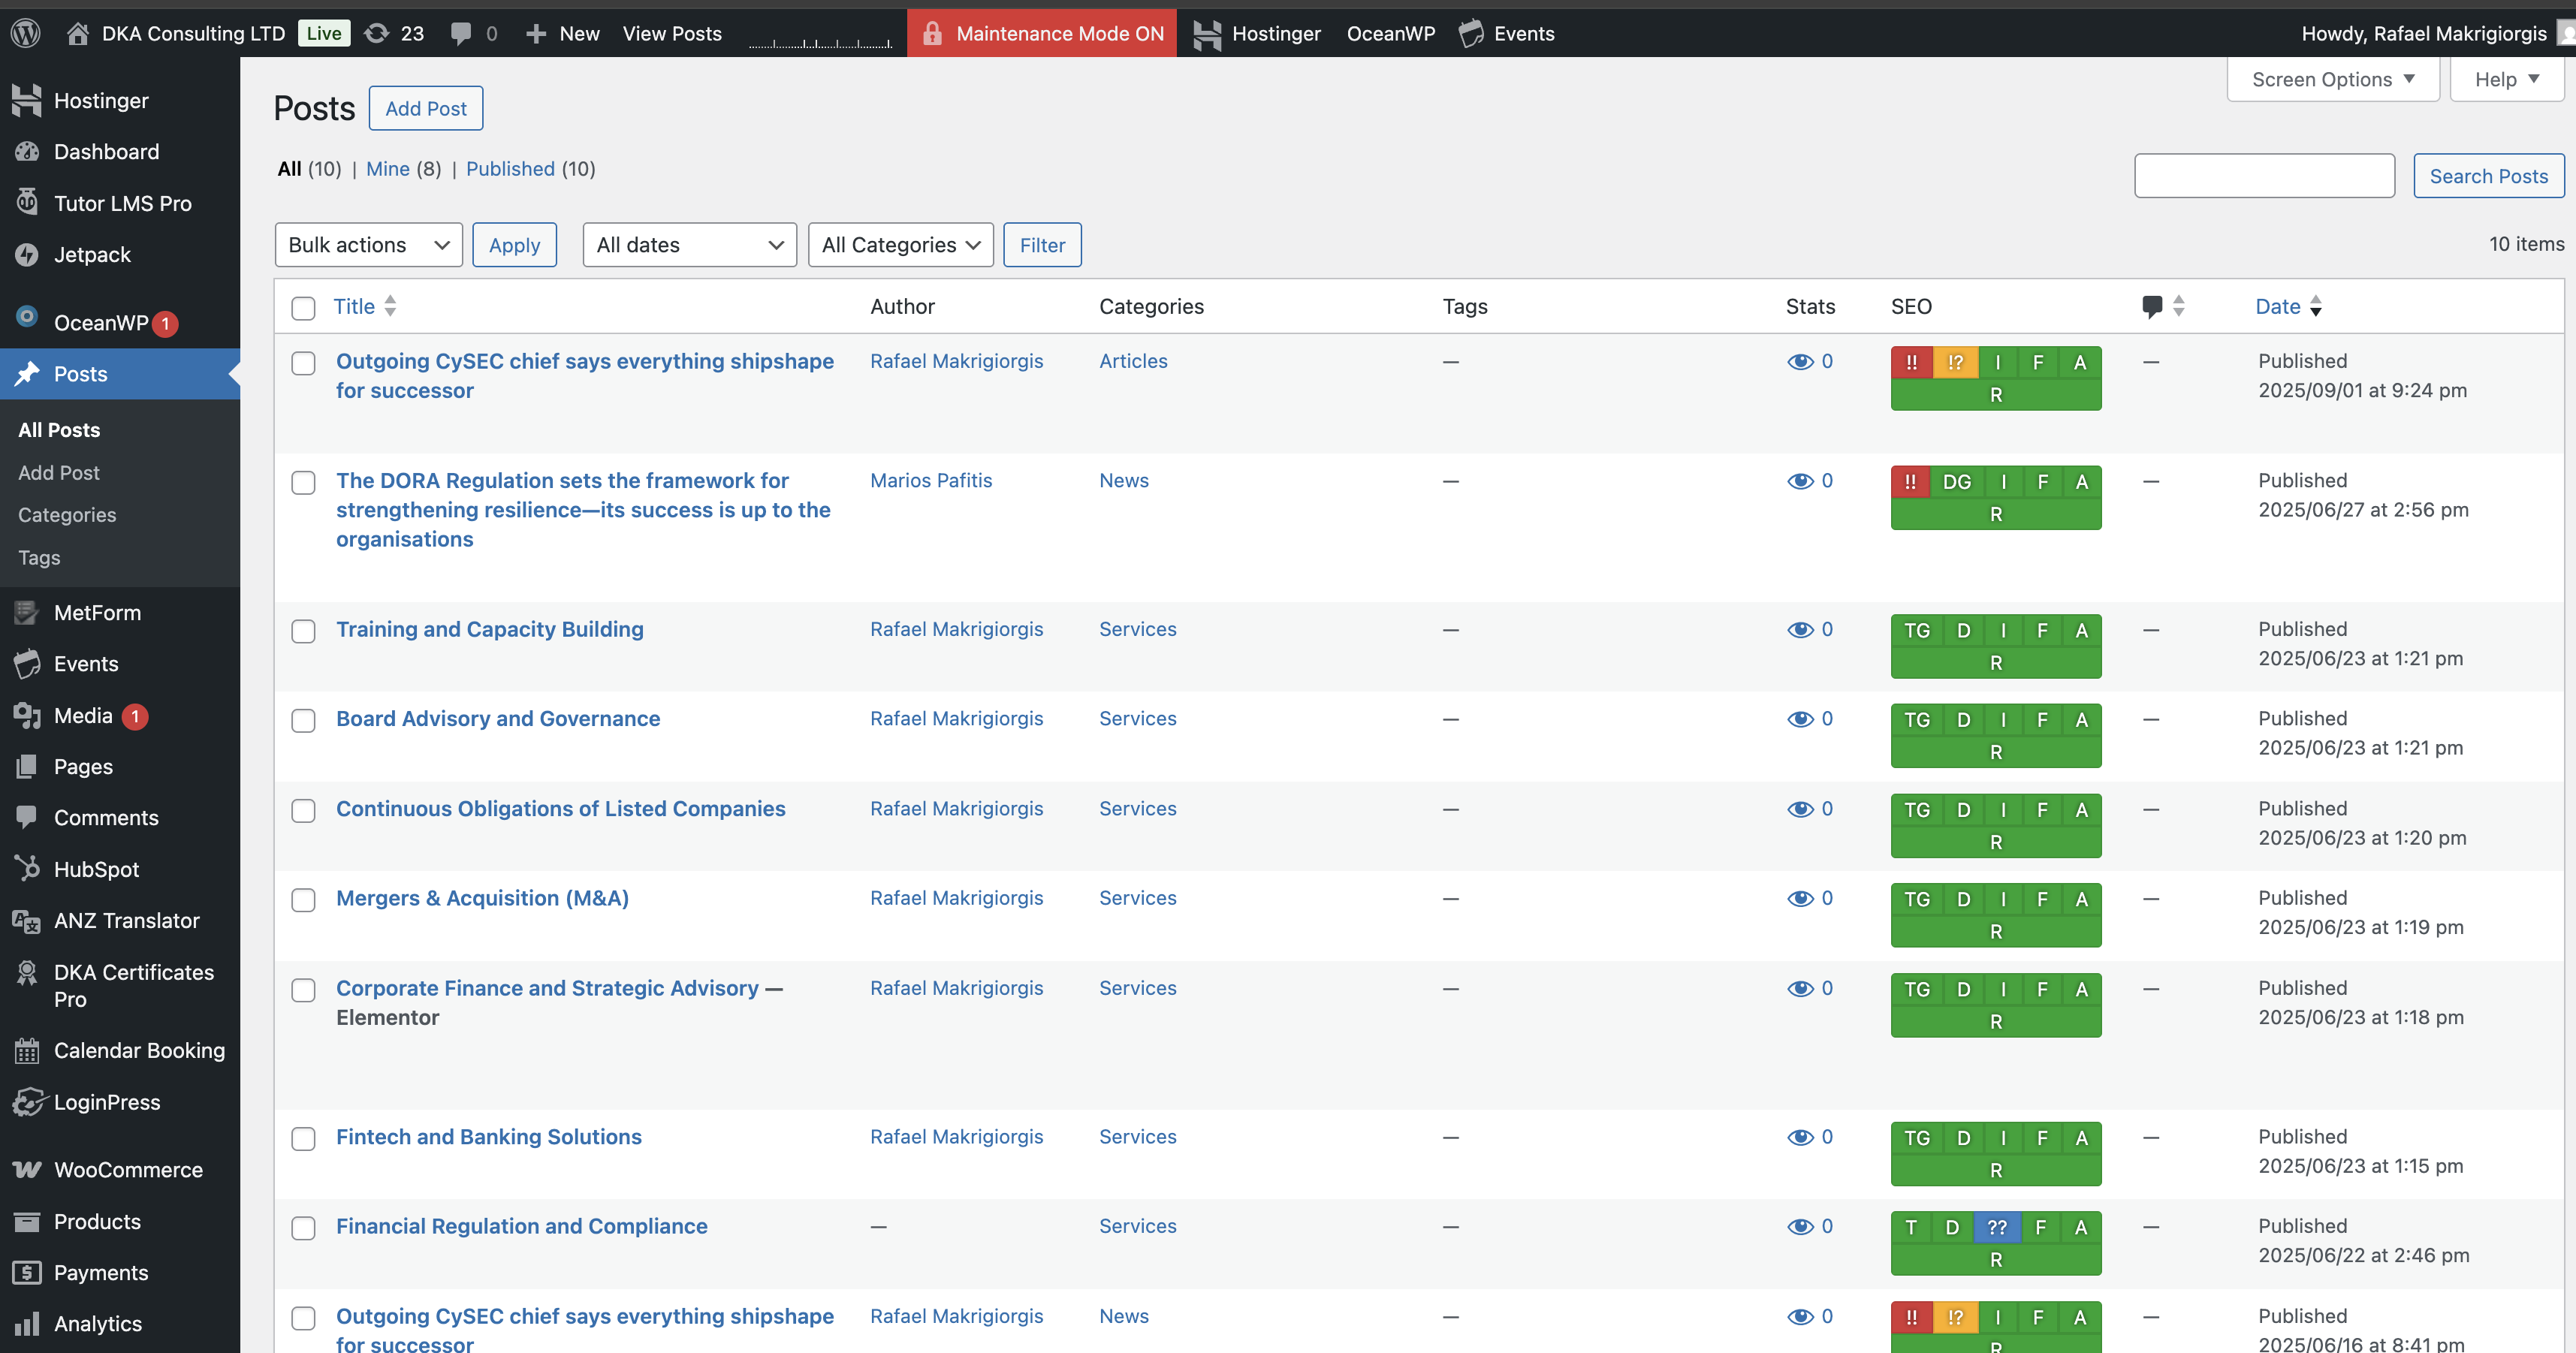
You'll see a list of all existing posts with options to edit, delete, or quick edit them.
Creating a New Post
Step 1: Start a New Post
- From the Posts screen, click the "Add Post" button at the top of the page
- Alternatively, hover over "Posts" in the left sidebar and click "Add New"
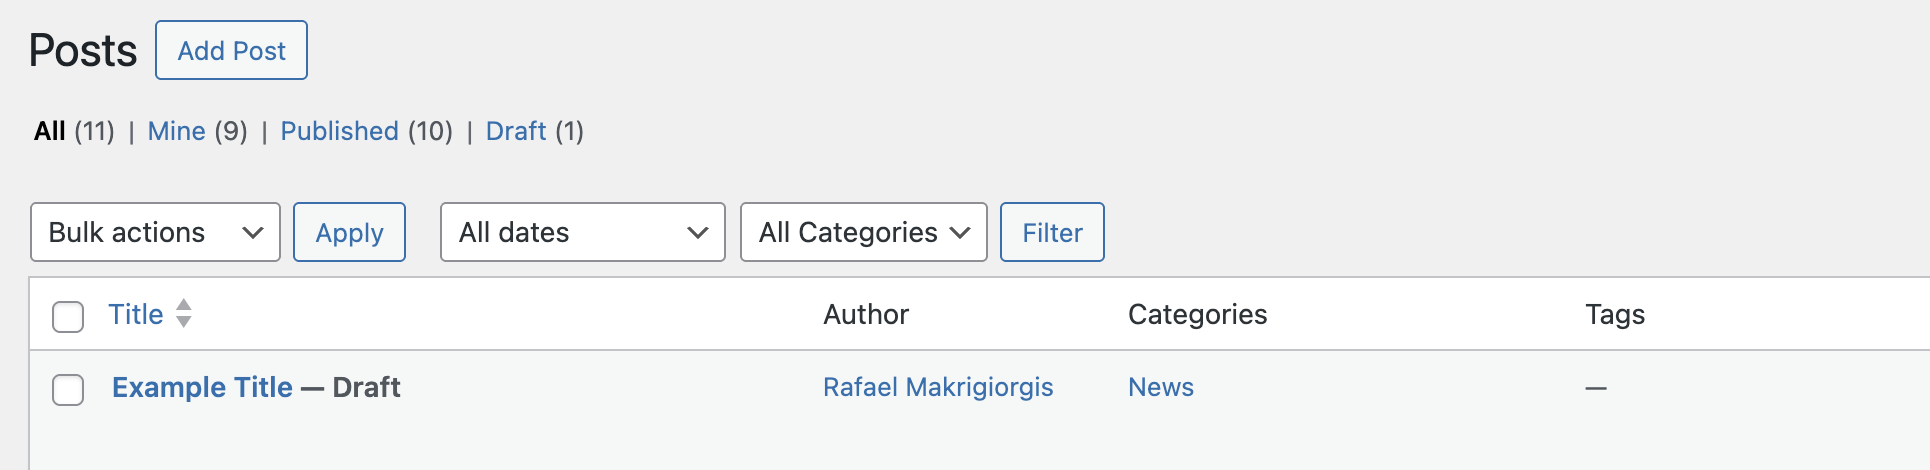
Step 2: Enter Your Post Title
- At the top of the page, you'll see a field that says "Add title"
- Click in this field and type your post title
- The title should be clear, descriptive, and engaging
Adding Content to Your Post
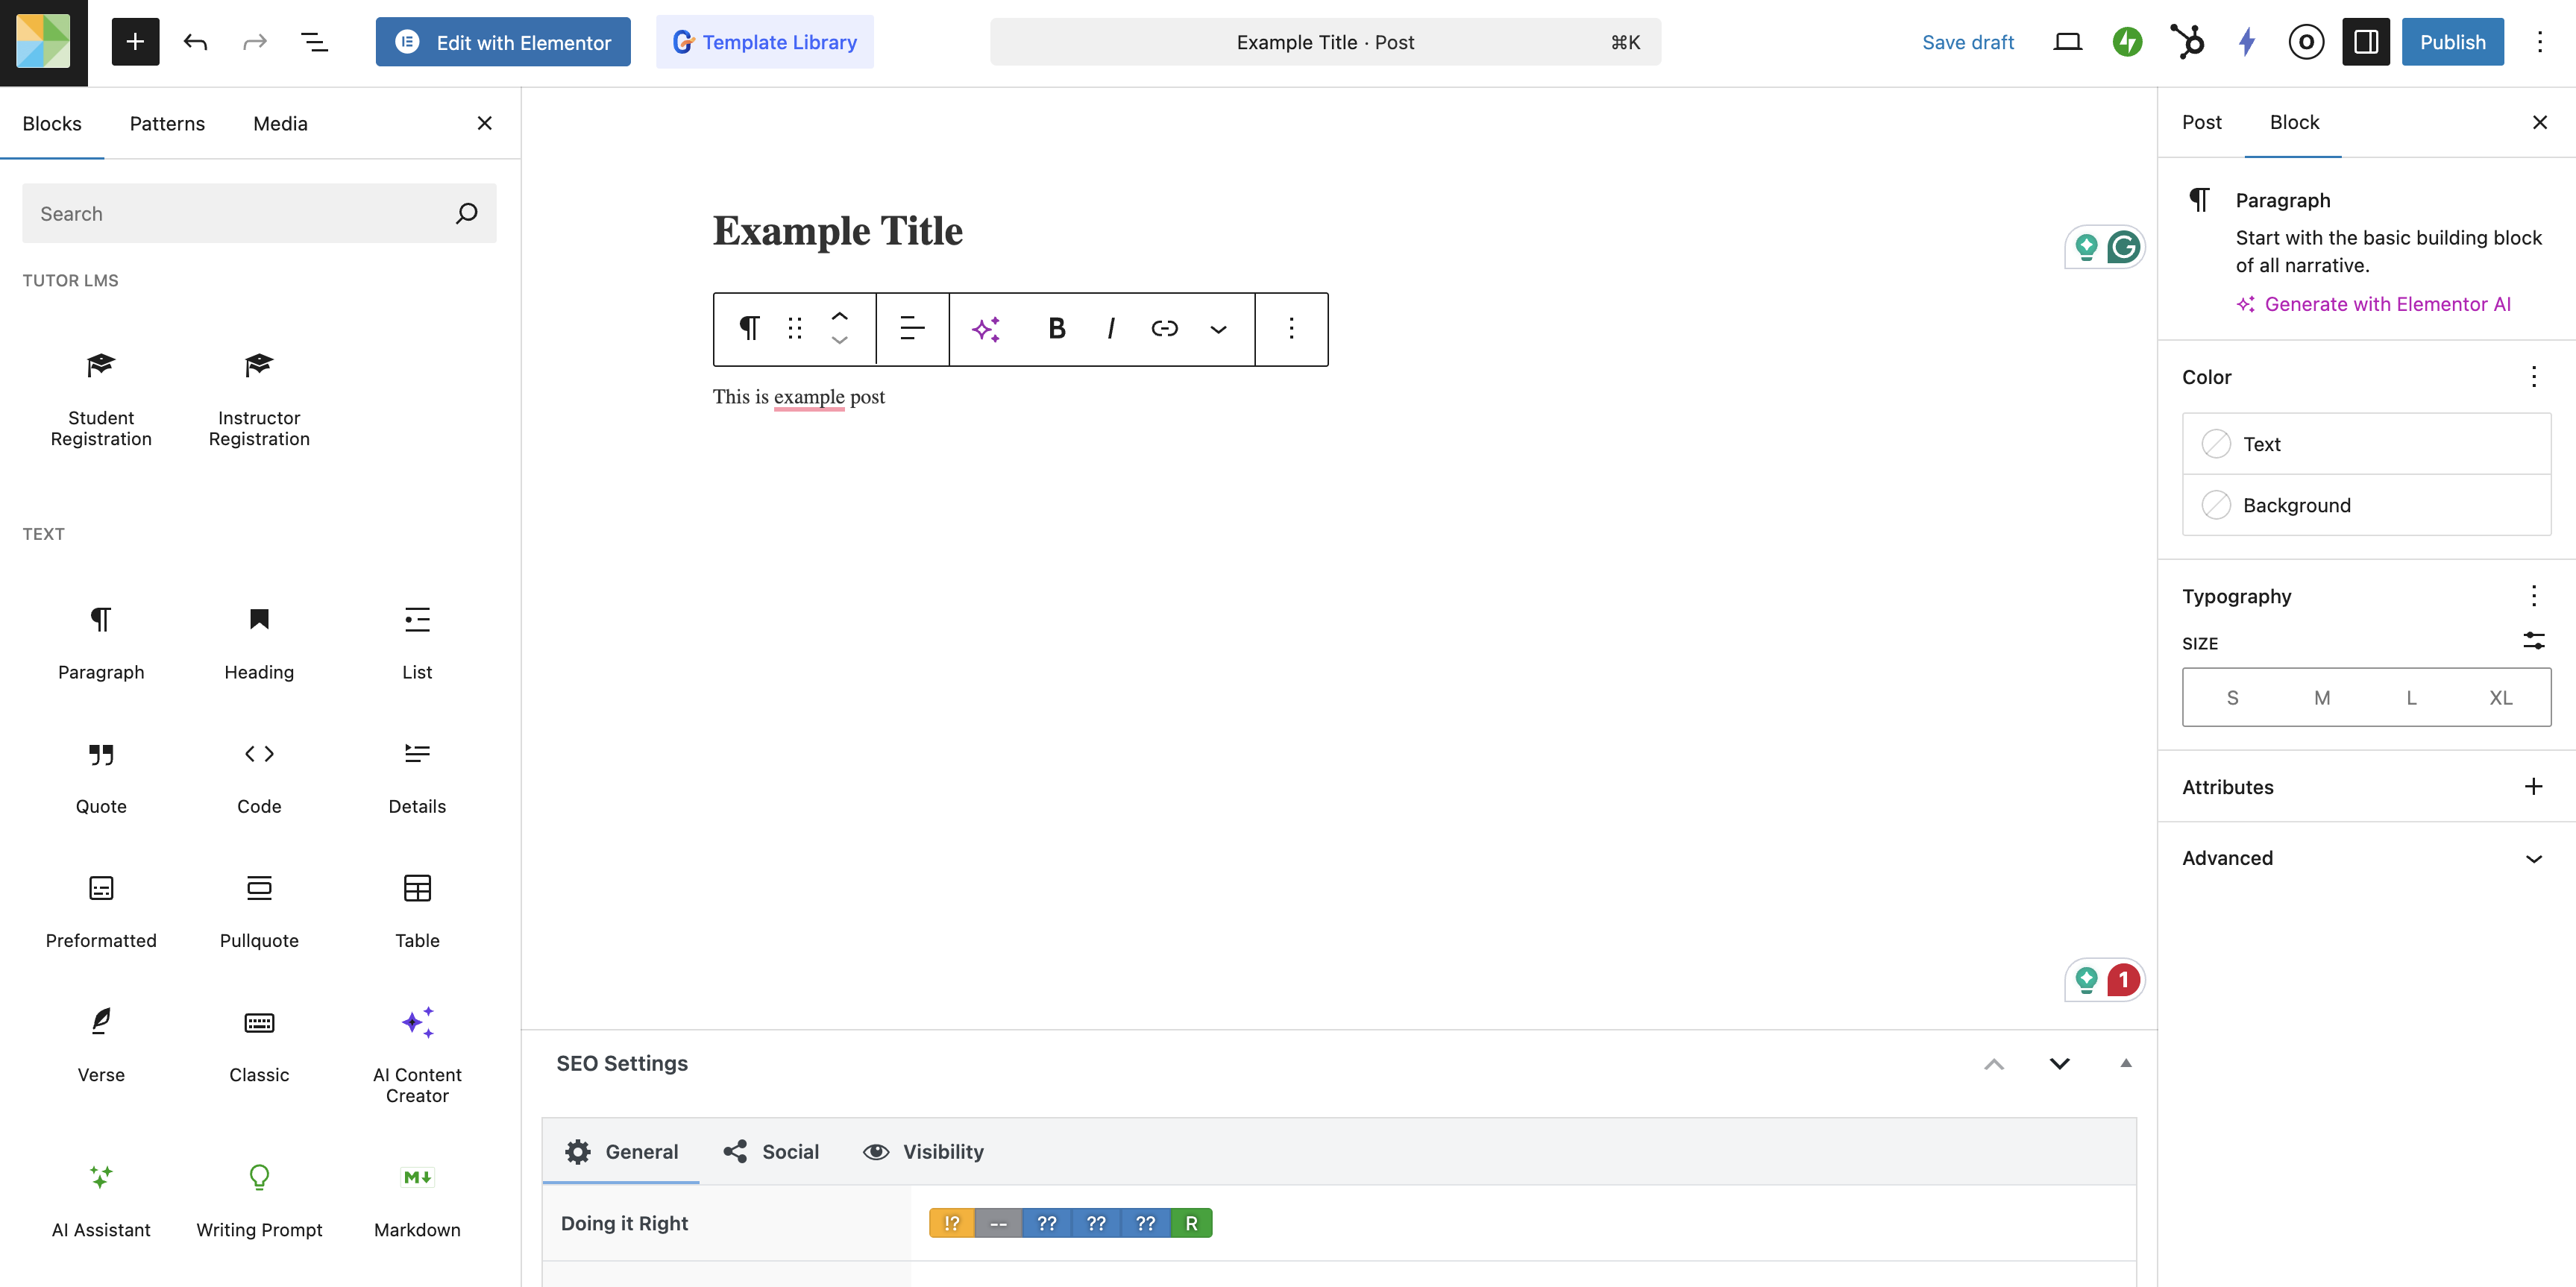
Using the Block Editor (Gutenberg)
Step 1: Add Content Blocks
- Click the "+" button to add a new block
- Choose from various block types:
- Paragraph: For regular text content
- Heading: For section titles
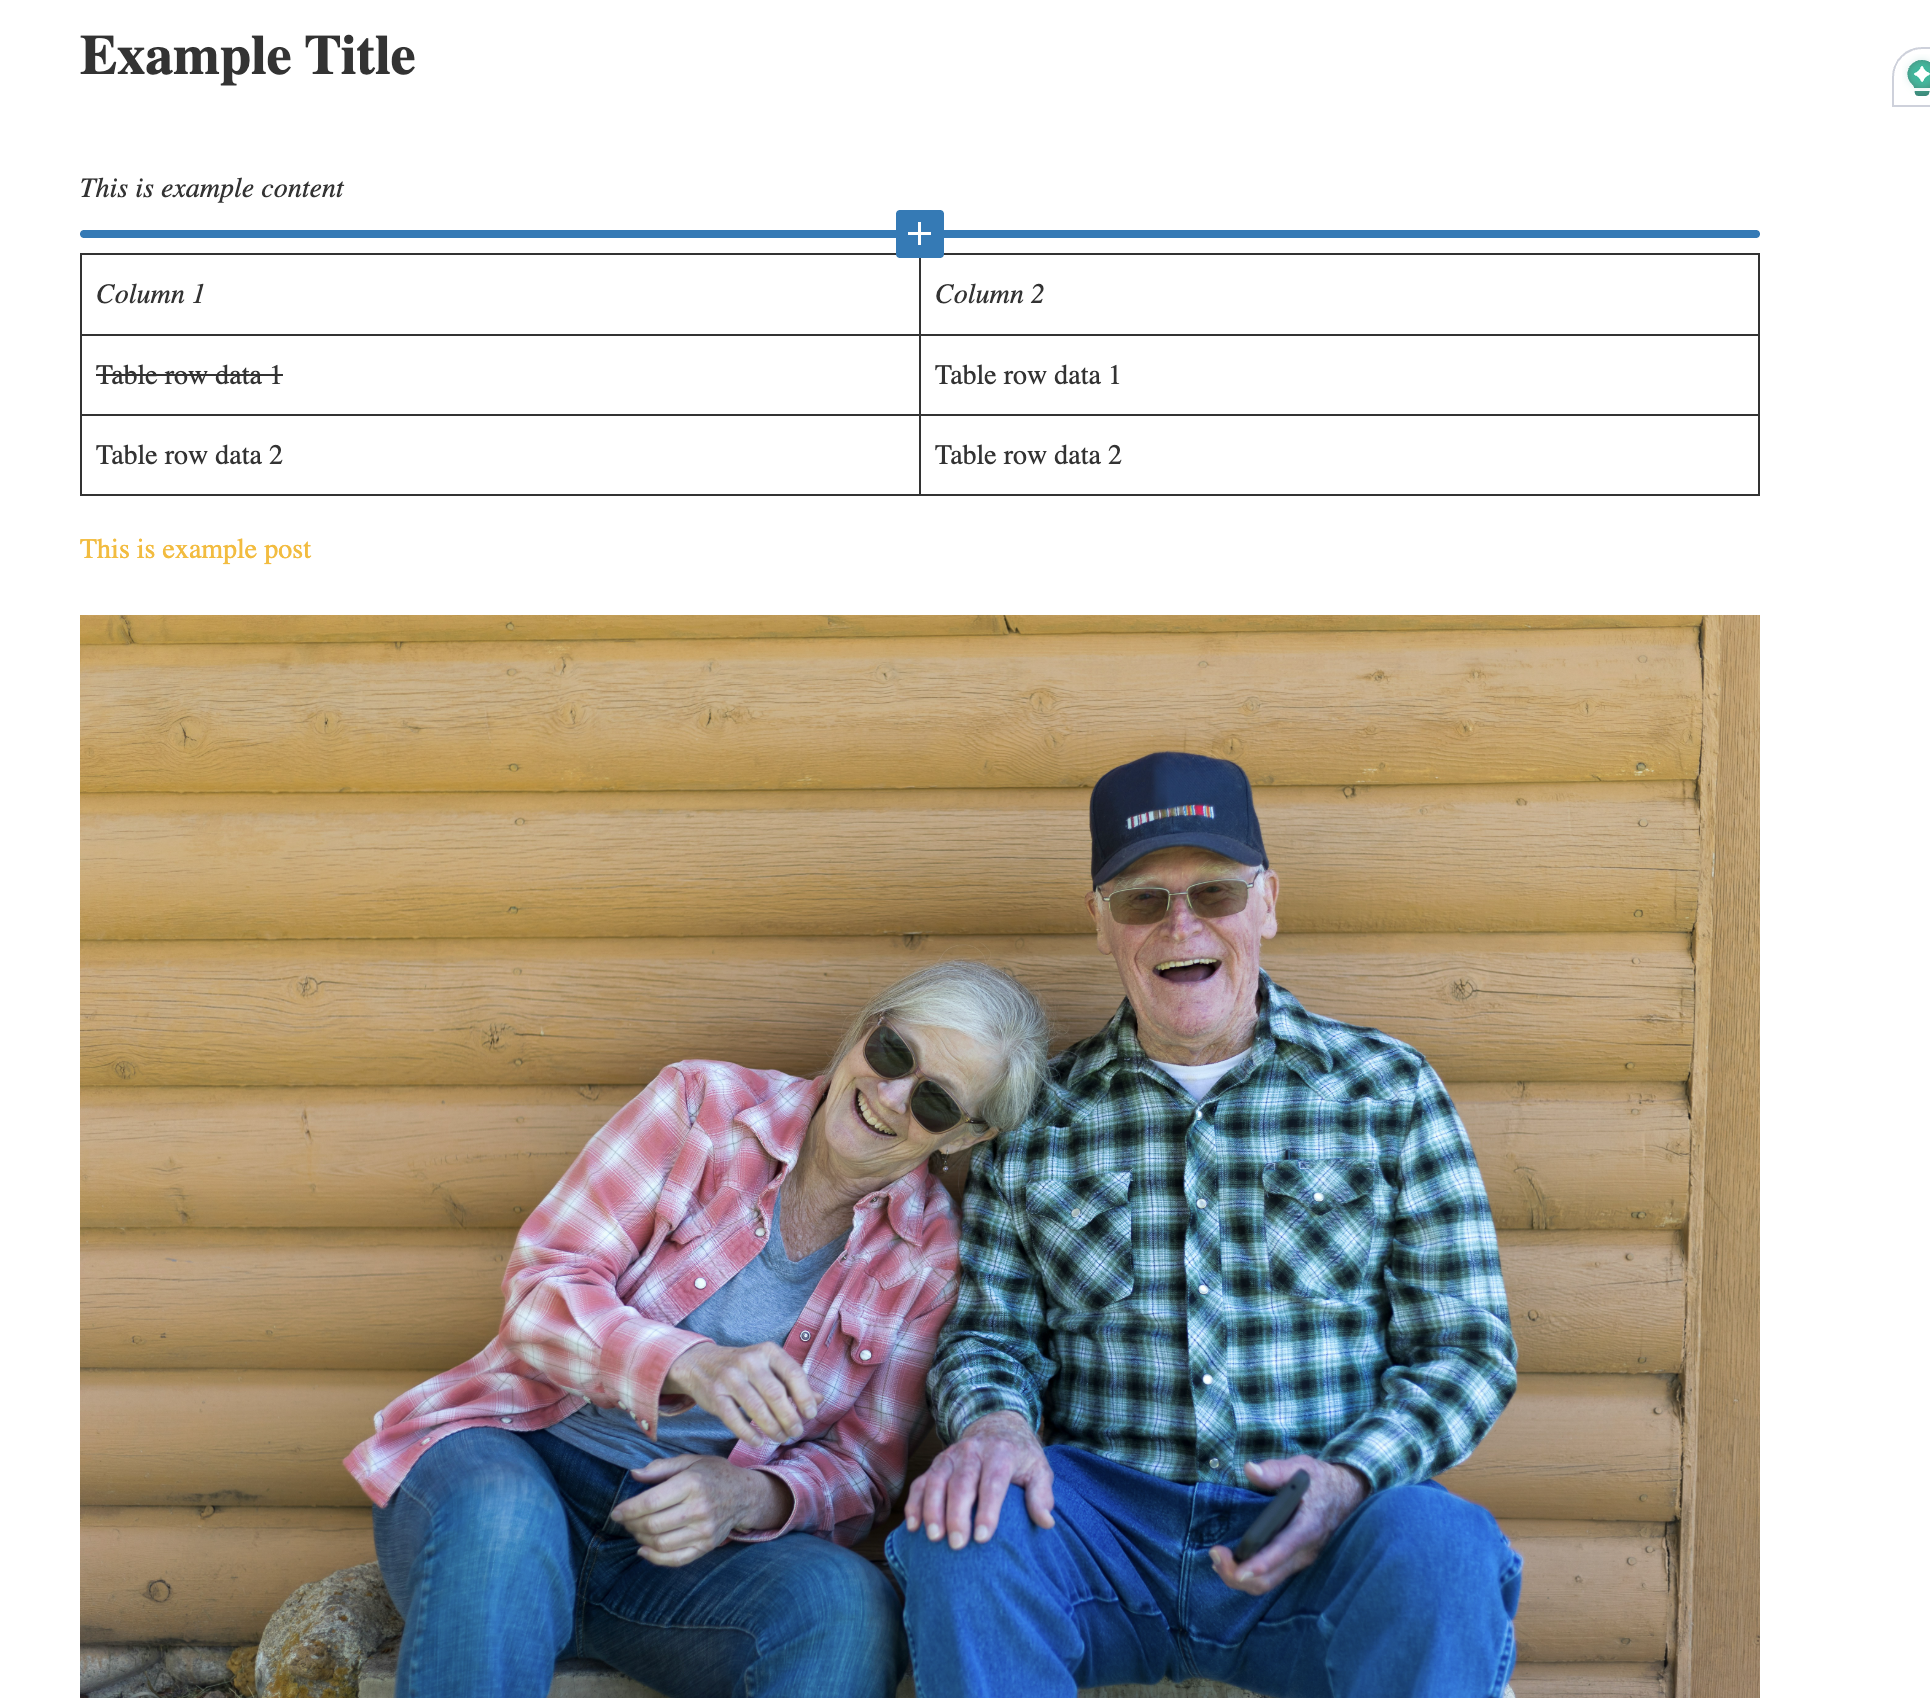
- Image: To insert images
- List: For bulleted or numbered lists
- Quote: For quotations
- And many more...
Step 2: Format Your Content
- Select text to see formatting options:
- Bold (B button)
- Italic (I button)
- Links (link icon)
- Text alignment
- Use headings (H2, H3, H4) to structure your content
- Add images by clicking the image block and uploading or selecting from media library
Step 3: Rearrange Blocks
- Click and drag the up/down arrows on each block to reorder them
- Use the toolbar at the top of each block for additional options
Assigning Categories
Categories help organize your posts and make it easier for visitors to find related content.
Step 1: Open the Settings Sidebar
- Look at the right side of the screen
- If the sidebar is not visible, click the gear or circle icon (⚙️) in the top right corner
- Make sure you're on the "Post" tab (not "Block")
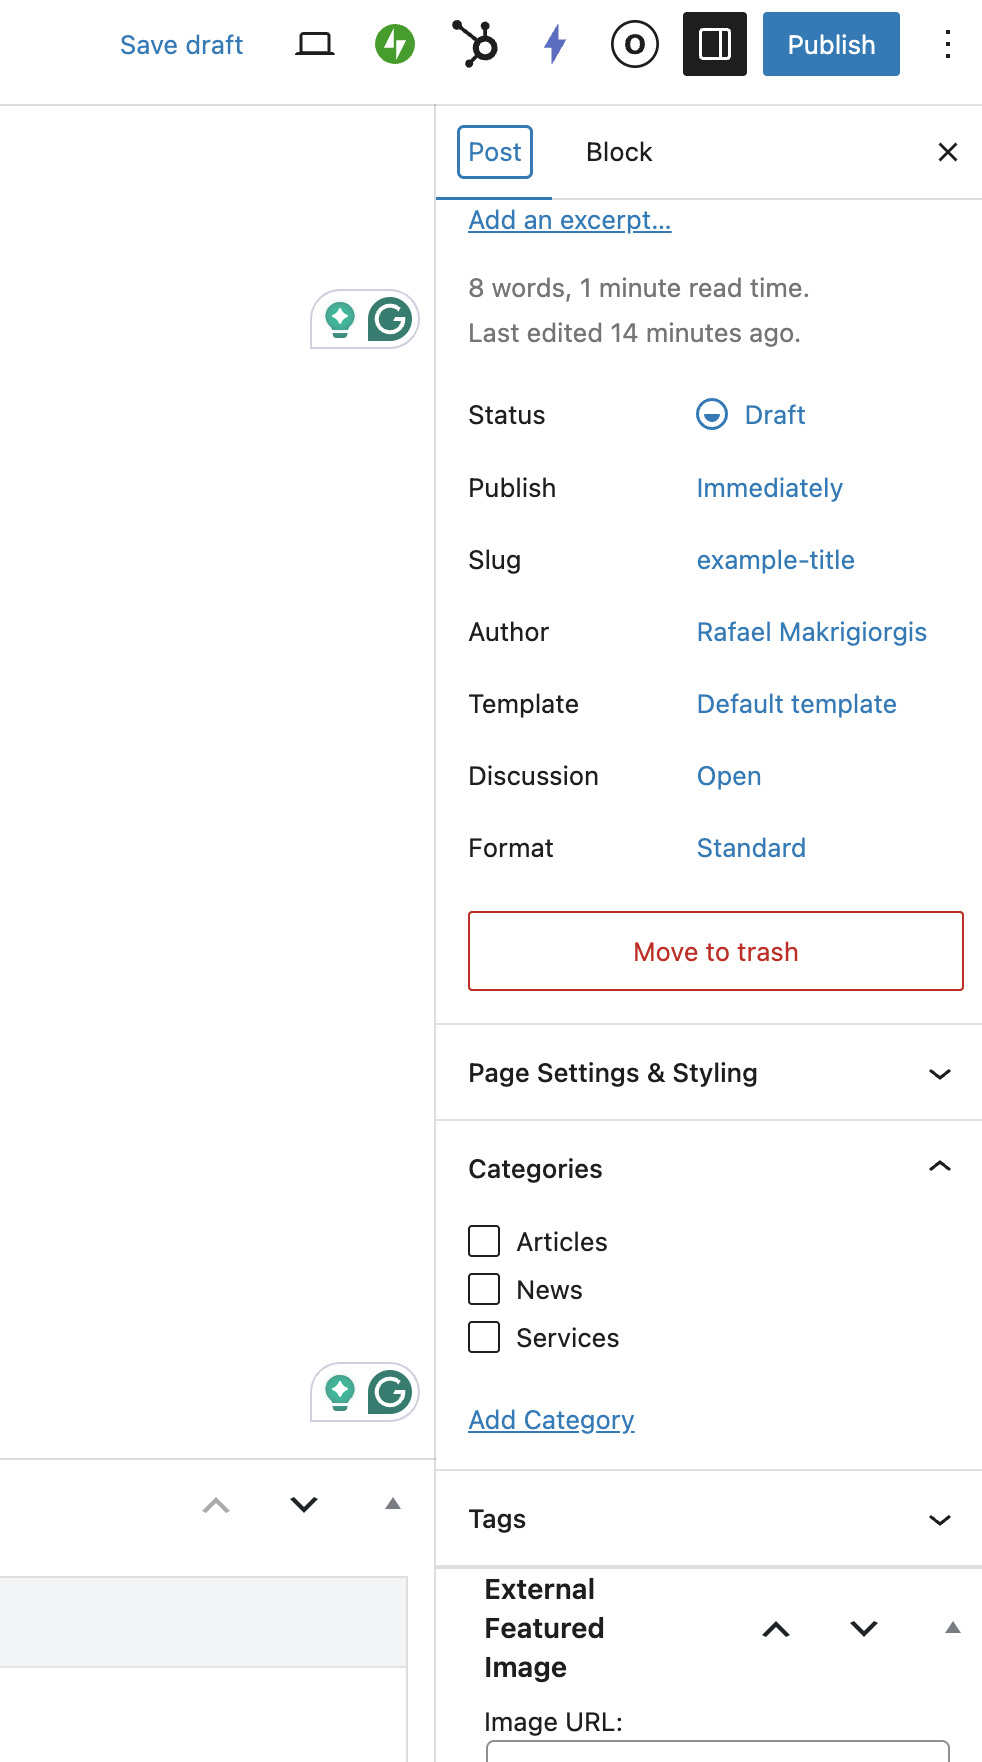
Step 2: Find the Categories Section
- Scroll down in the right sidebar
- Locate the "Categories" section
Step 3: Select Categories
- You'll see a list of available categories
- Check the box next to each category you want to assign to your post
- You can select multiple categories if appropriate
Step 4: Add New Category (if needed)
- If you need a category that doesn't exist, click "Add New Category"
- Enter the category name
- Select a parent category if this is a subcategory (optional)
- Click "Add New Category" button
Publishing Your Post
Before Publishing - Review Your Content
Checklist: - ✅ Post title is clear and descriptive - ✅ Content is well-formatted and free of errors - ✅ Images are added and properly positioned - ✅ At least one category is assigned - ✅ Links are working correctly
Step 1: Preview Your Post (Optional)
- Click the "Preview" button in the top right
- Select "Preview in new tab" to see how your post will look to visitors
- Review and close the preview tab
Step 2: Publish Your Post
- Look at the top right corner of the screen
- Click the "Publish" button
- A confirmation panel will appear
- Review the visibility settings (Public, Private, or Password Protected)
- Click "Publish" again to confirm
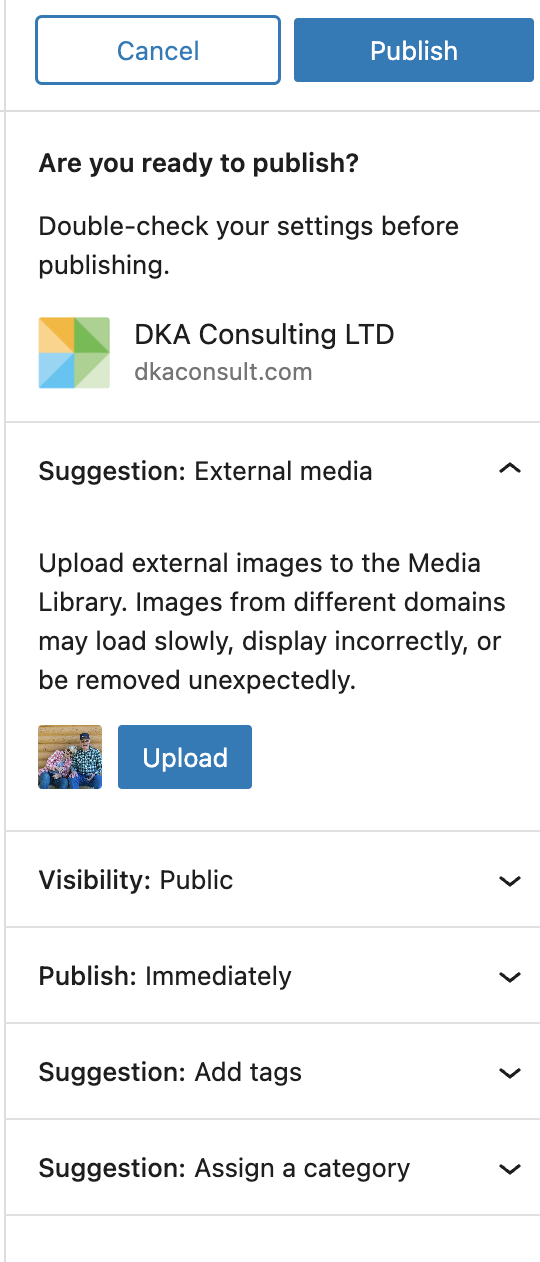
Success! Your post is now live on the website.
Editing Existing Posts
Step 1: Access the Post
- Go to Posts → "All Posts"
- Find the post you want to edit
- Hover over the post title
- Click "Edit"
Alternatively, you can click directly on the post title.
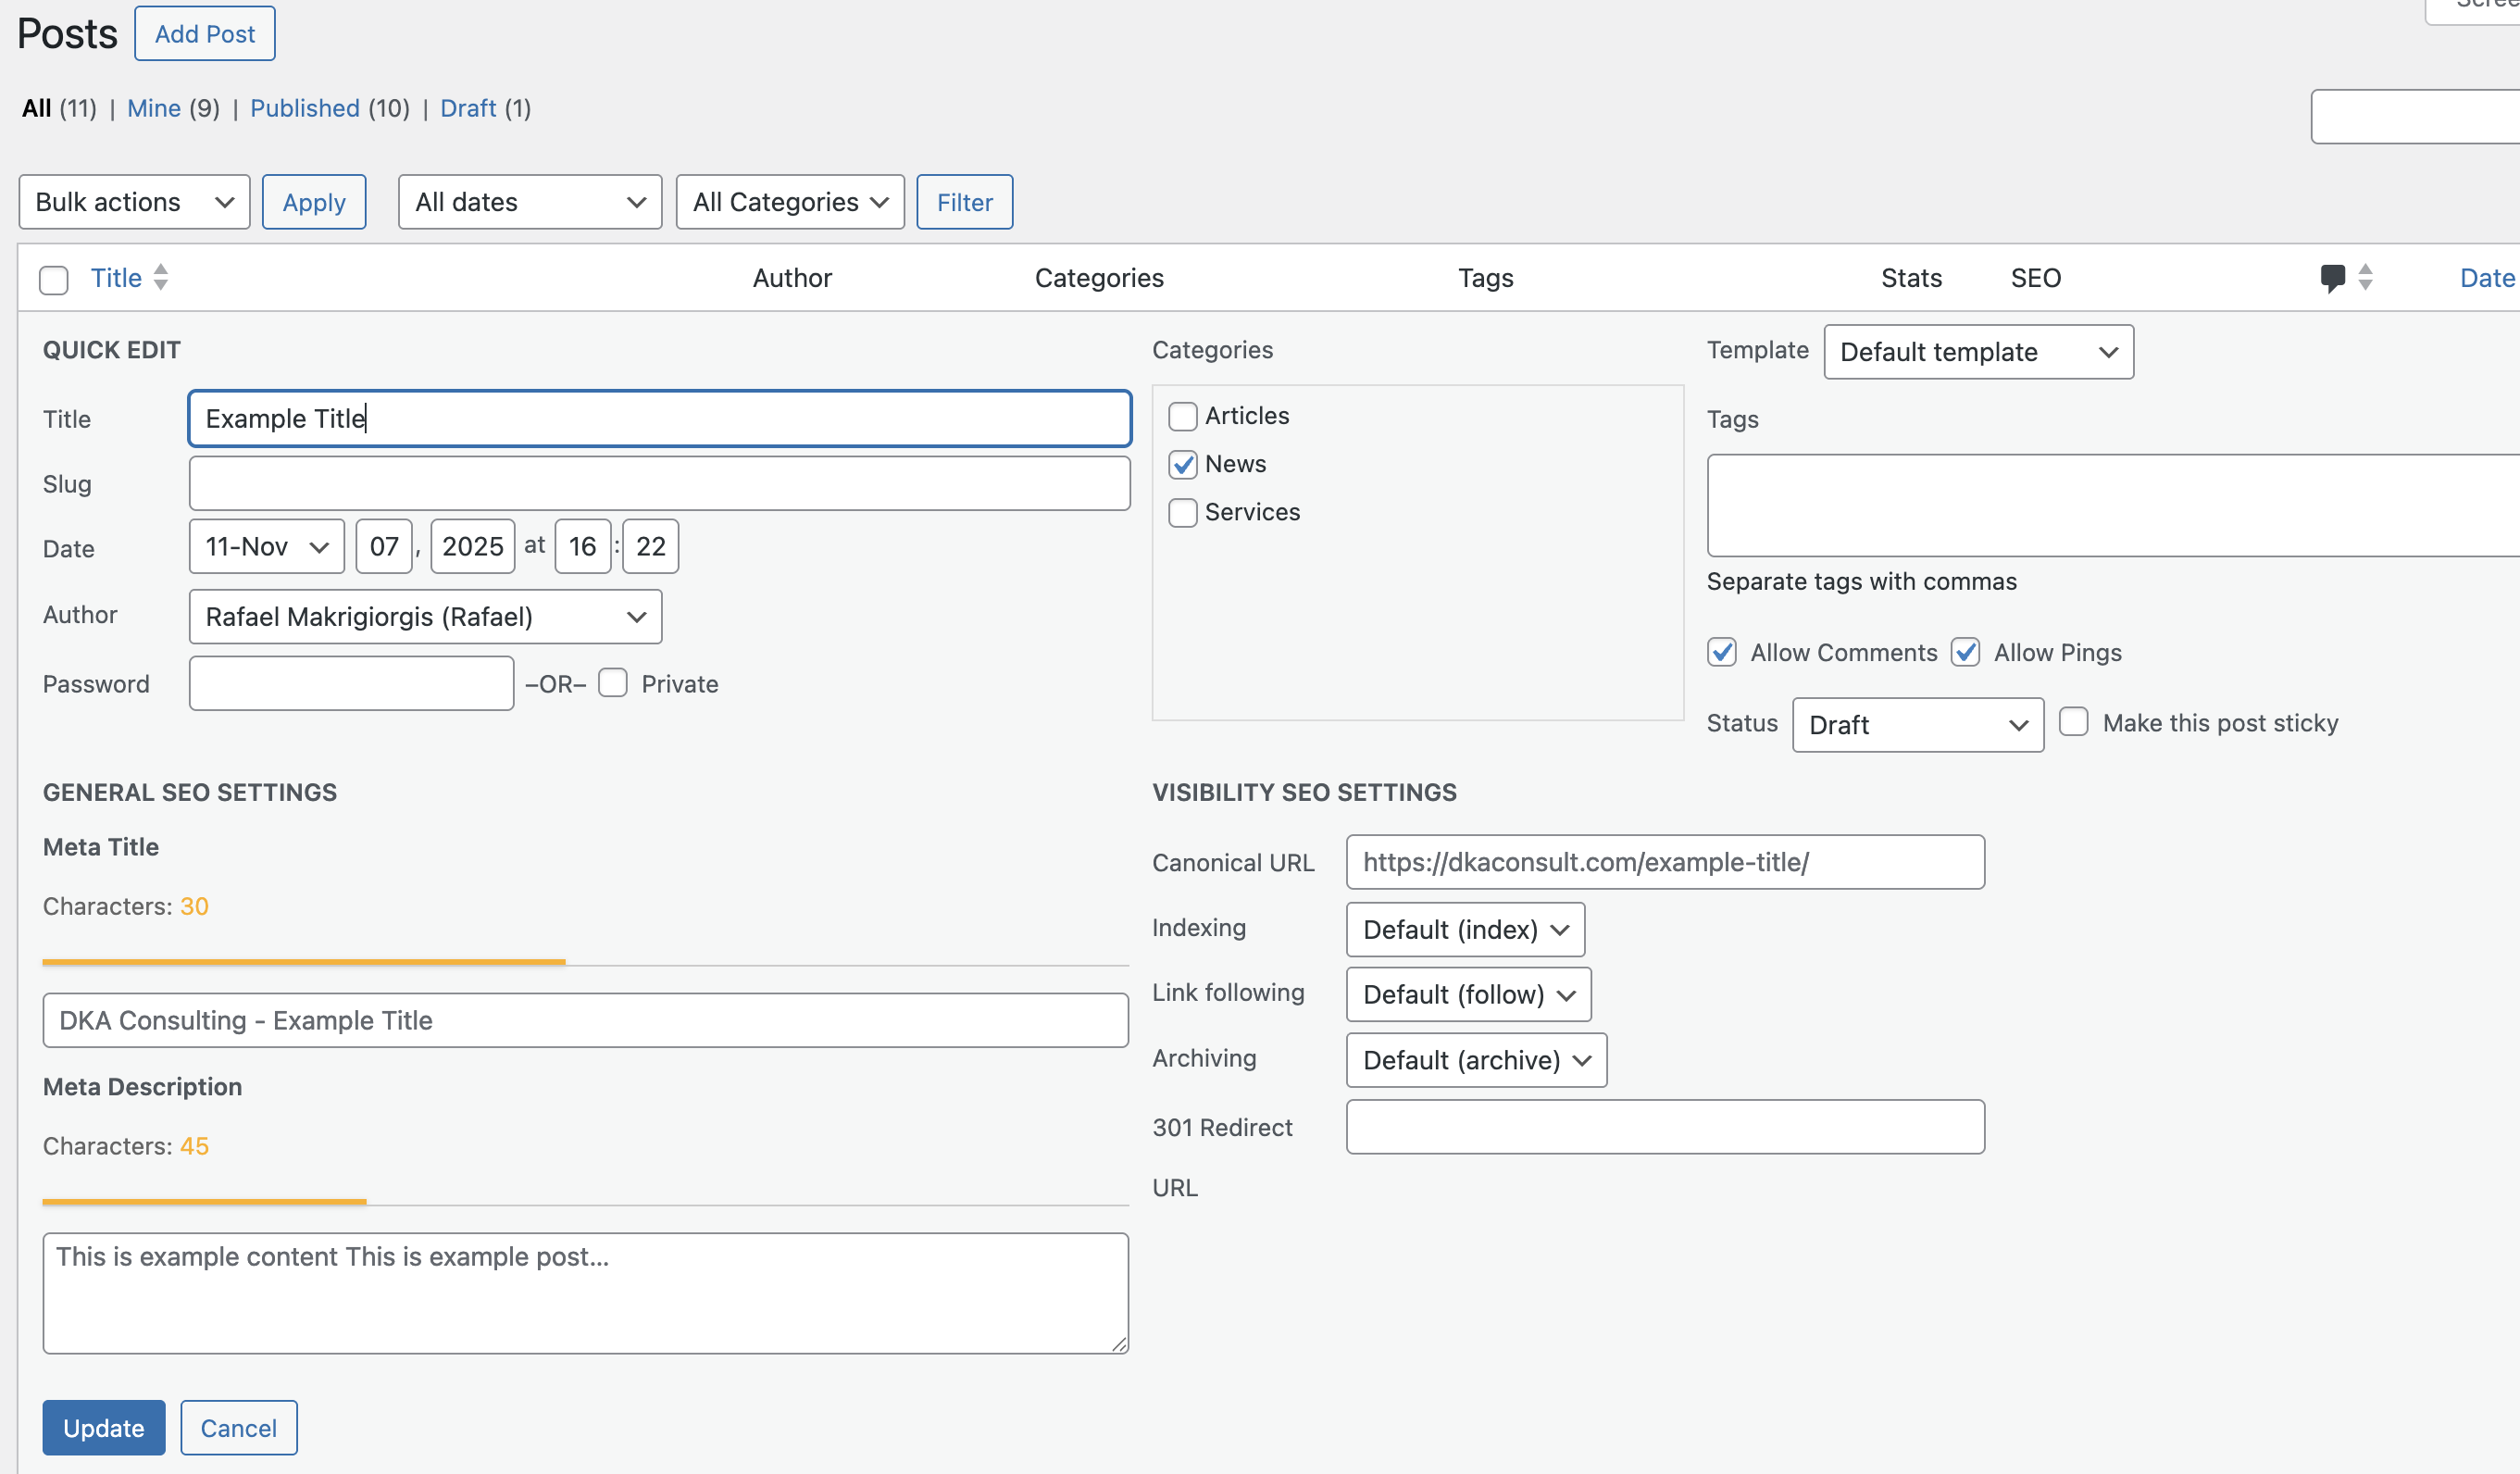
Step 2: Make Your Changes
- Edit the title, content, or categories as needed
- Use the same editing tools described in the "Adding Content" section
Step 3: Update the Post
- When finished editing, click the "Update" button in the top right
- Your changes will be saved and live on the website immediately
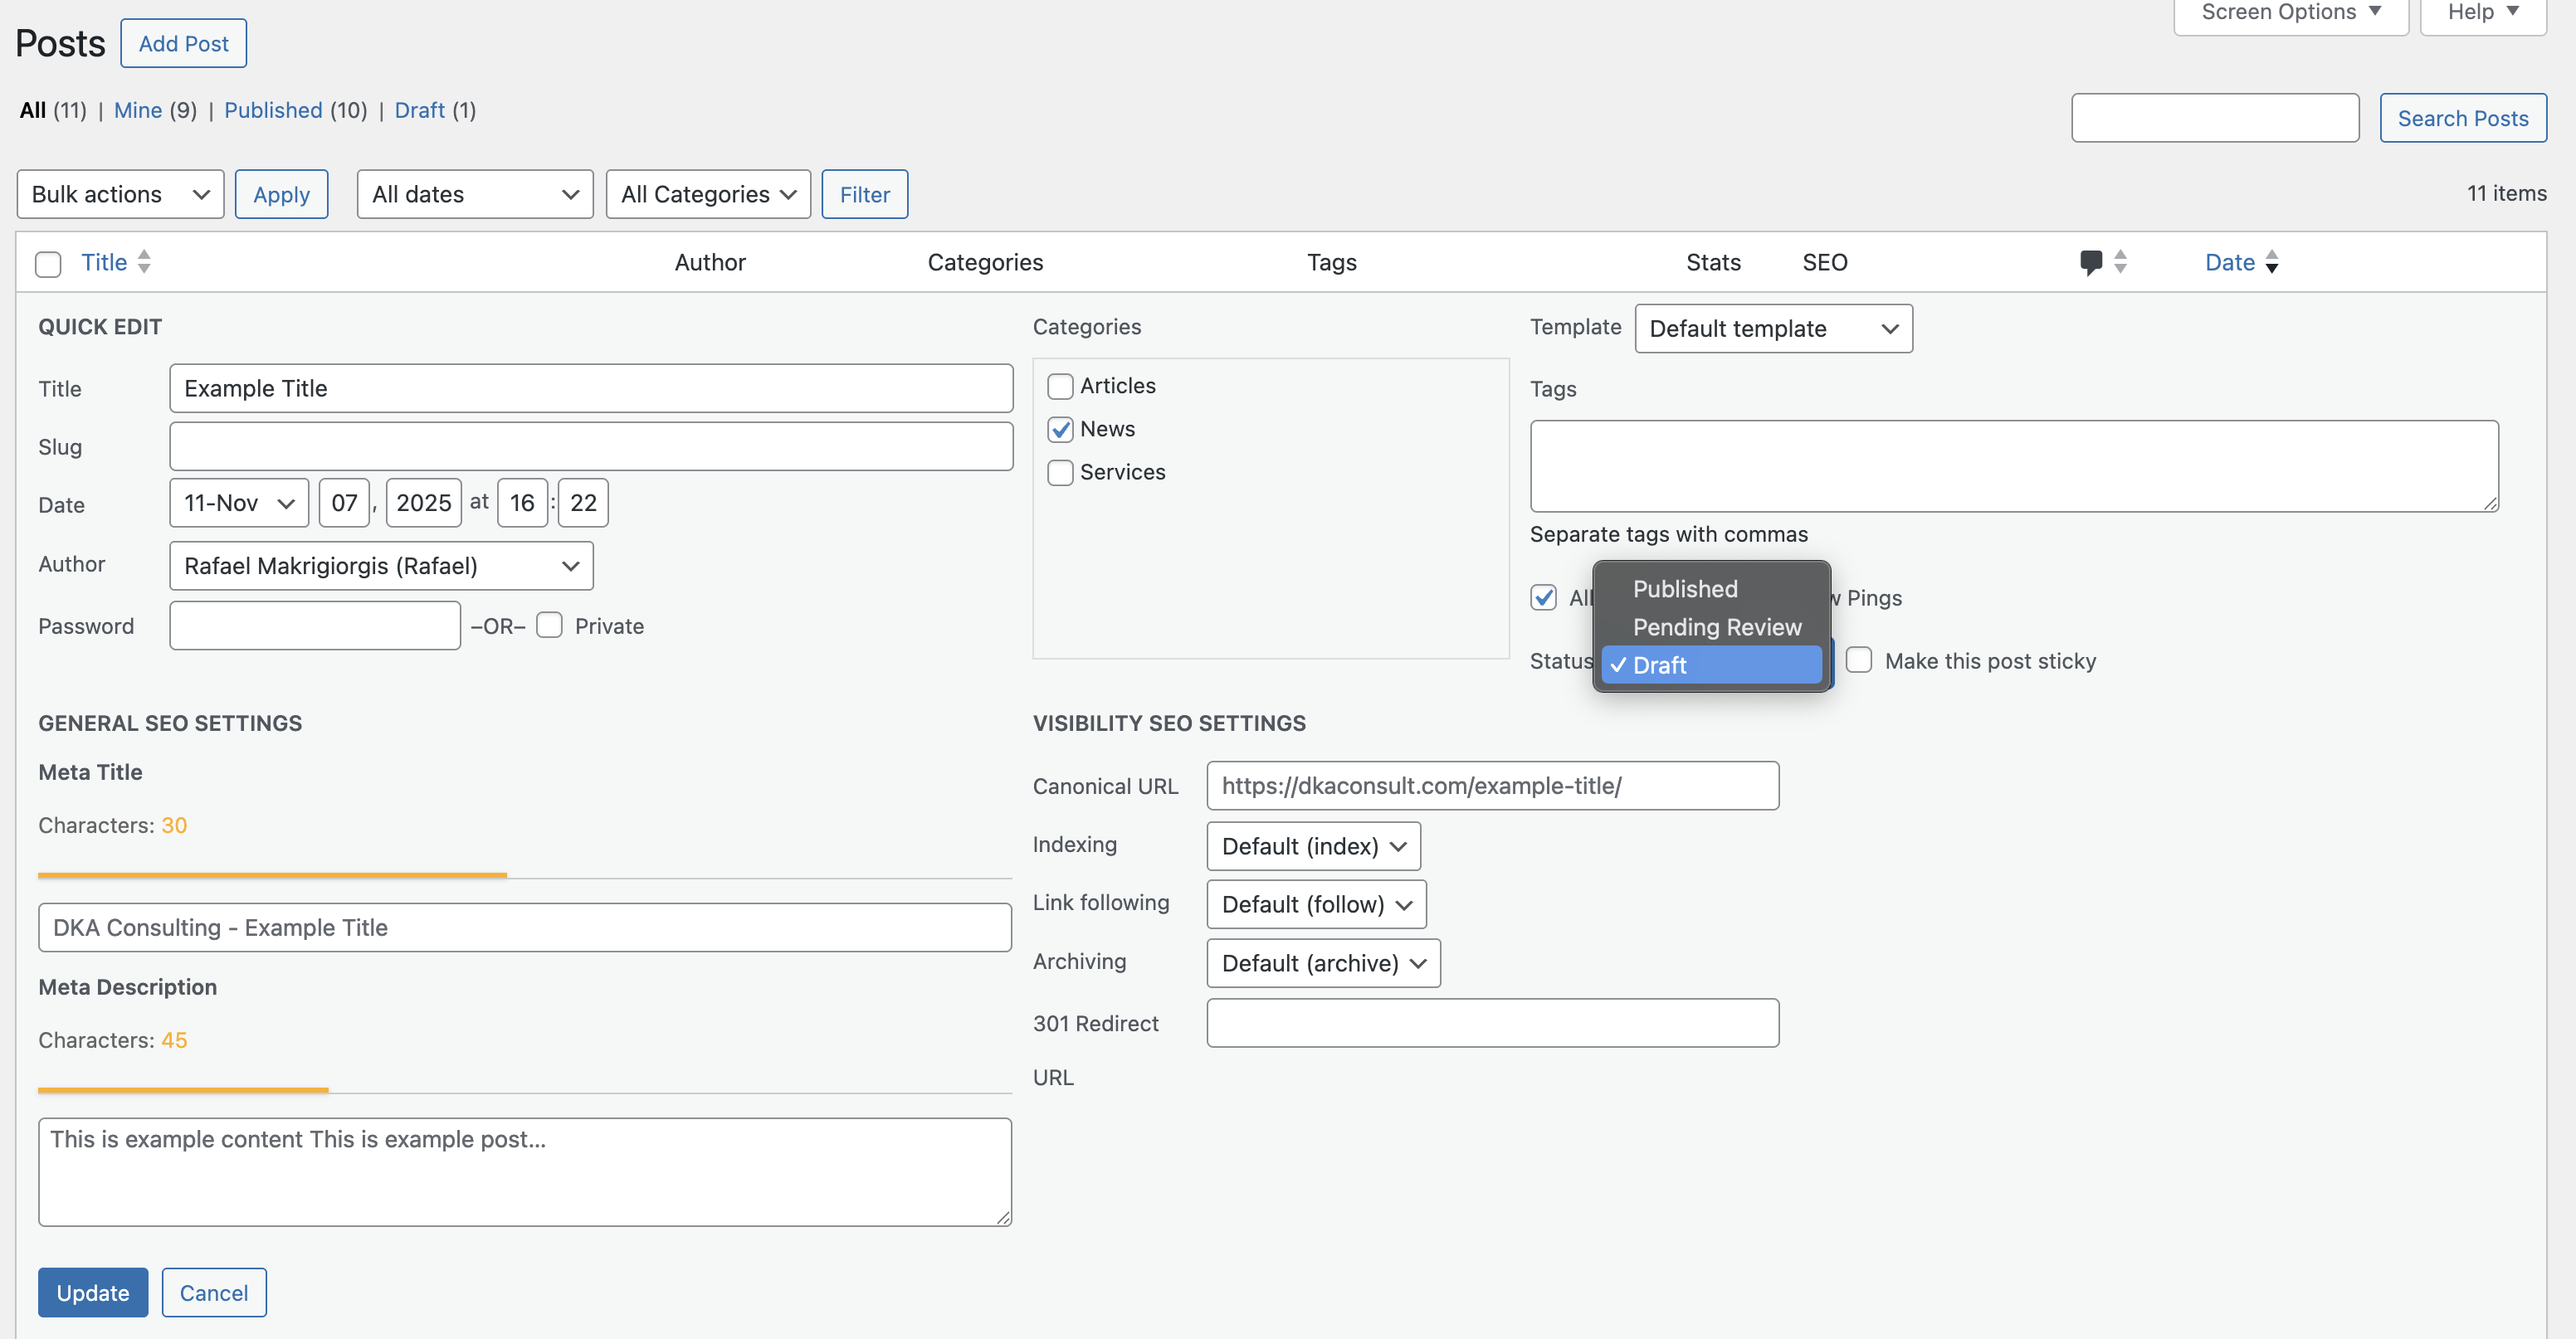
Post Management Tips
Best Practices
Content Quality: - Write clear, concise, and engaging content - Use headings to break up long sections - Include relevant images to enhance readability - Proofread before publishing
SEO (Search Engine Optimization): - Use descriptive post titles - Add relevant categories - Include internal links to other posts - Use alt text for images (accessible in image settings)
Organization: - Assign appropriate categories to every post - Use consistent category structure - Review and update old posts periodically
Quick Actions
From the All Posts screen, hover over a post to access quick actions: - Edit: Open the full post editor - Quick Edit: Edit title, slug, date, categories, and tags without opening the full editor - Trash: Delete the post (can be restored from Trash) - View: See the published post on the website
Additional Features
Featured Image
- In the right sidebar, scroll to "Featured Image"
- Click "Set featured image"
- Upload or select an image
- This image often appears in post listings and social media shares
Tags
- Similar to categories but more specific
- Add tags in the right sidebar under "Tags"
- Enter tags separated by commas
Excerpt
- A short summary of your post
- Found in the right sidebar
- Used in post listings and previews
Troubleshooting
Can't see the categories? - Make sure the settings sidebar is visible (click the gear icon) - Scroll down in the sidebar to find the Categories section
Changes not appearing? - Clear your browser cache - Try viewing the post in an incognito/private window - Ensure you clicked "Update" or "Publish"
Lost your edits? - WordPress autosaves every few seconds - Check "Revisions" in the right sidebar to restore previous versions
Congratulations! You now know how to create, edit, and manage posts on the DKA Consult website. Practice these steps to become more comfortable with the WordPress editor.